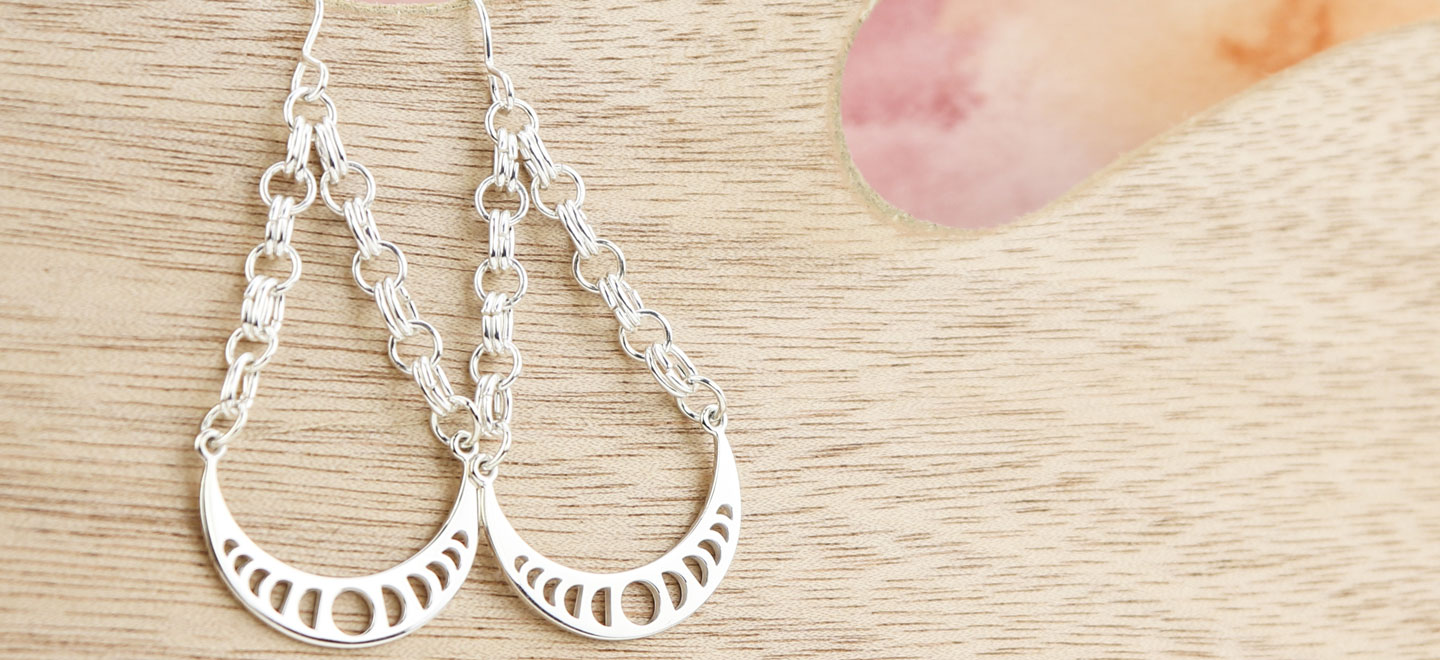
Play around with jump rings! Learn all about jump rings including what they are and different types. Also explore creative design possibilities with these versatile jewelry components.
What Are Jump Rings?
Jump rings are simple, tiny wire circles used to connect parts when making jewelry. They are quite small, between 3mm and 10mm in size. These essential findings are usually sold with a single cut in the circle so they can be opened and closed to join other items. Primarily used to attach a clasp to a chain or a drop to an earwire, jump rings are the go-to finding when cold connecting two items together. Jump rings are a staple in every jewelry studio. Consistently, year-after-year, they make our bestseller list here at Halstead.
Types of Jump Rings
- Open - Standard round, open connectors to join items with small rings, hole punches, or top loops.
- Closed - Soldered closed round connectors to slide onto chains or provide secure connections that cannot be stretched open with wear or use over time.
- Oval - Open connectors with an oval shape that allows for a slimmer profile connection point against the body. Often preferred for charms or pendants.
- Split Rings - Round spiraled wire connectors like tiny key rings. Components are wound into the split ring so they cannot accidentally come loose over time.
- Hard Snap - Round, open wire connectors that have been hardened so the wire is less flexible. This makes the closure more secure once in place.
Making Your Own Jump Rings
There is a long-running debate in the jewelry world: Should you make your own jewelry findings? Metalsmiths from traditional programs learn how to make every single component needed in jewelry as part of a thorough education in fabrication craftsmanship. Purists believe that jewelry should come from only raw metal materials: sheet, wire and casting grain. But, at a certain point, your time is better spent tending to higher-skilled fabrication work or the business of running your studio. Still, some jewelry artists swear by making their own jewelry findings. So, does it really make sense?
Yes and no. It saves you money to make your own parts if you look strictly at material cost vs. prefabricated findings cost. But, the time and energy put into creating piles of basic findings may not necessarily be the right choice when you look at your business expenses overall. Would your time be more productive designing or selling jewelry instead? If so, this is an easy trade-off decision.
To make your own jump rings, you will need a power drill and steel rod mandrels in the diameters you want. Clamp wire to your mandrel to get started. Then, slowly run the drill and guide the wire into a coil on the mandrel. When you are done, saw along one edge of the coil to create your jump rings. Sometimes handmade jump rings are often a bit wonky and require filing at the ends to ensure a secure, flush closure. Handmade jump rings are also pretty soft so you will need to temper the wire for them to stay closed on a piece of jewelry. That means time in the tumbler to work harden the metal, an extra step.
Five Creative Uses for Jump Rings
Don't limit yourself to the basics. Sometimes just playing in a jewelry studio can open your eyes to new uses and ideas. Here are a few different ways to create new jewelry pieces using these fun little findings.
1. Make Simple Chain Maille or Jewelry Chains
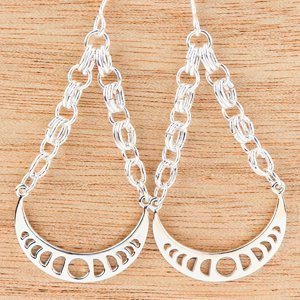
I have never attempted a chain maille piece before, so I thought I'd give it a shot as part of a simple earring design. These are jump rings inter-connected using a simple 2-to-1 pattern. The rings used are 6x4mm, 18ga oval jump rings, with phases of the moon festoon link and a 13x20mm, 20ga long hook wire. I was worried that the earrings would become too heavy with the chain maille and the links, but fortunately, I was wrong and they weigh .12 oz each.
2. Solder Circle Patterns
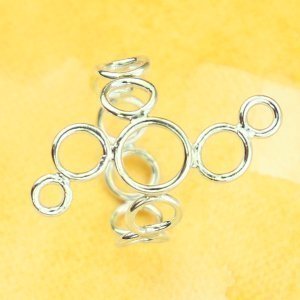
This jump ring design was trickier because I needed a specific length for the ring band in order for it to fit specific size. I laid the rings out, measured the length, added and removed as needed until the length was spot on. To complete the piece I used 4, 6 & 8mm rings with a medium solder on the joins. I held my breathe when I shaped it around a mandrel using a rawhide hammer, but it held together perfectly. After tumbling it for a couple of hours in steel shot, it came out stronger than I hoped for. I love the way this ring turned out. It looks like bubbles or planets.
3. Concentric Circle Designs
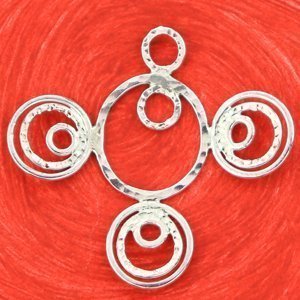
This piece wasn't designed ahead of time. I literally took random rings and just laid them in different positions until I chose the design. Then it just grew from there. I soldered the joints, ran it through the rolling mill to flatten it, decided to hammer some of the rings and left the other ones as is. I then used nylon pliers to lift up the inner jump rings on the outer groups. If I were finishing it, I would hang a drop from the center to complete the piece. The jump rings I used were: 4, 6, 9, 12 & 16mm. I'm curious to explore the possibilities of this concept as a chandelier earring finding or fringe necklace pendant.
4. Add Loops to Alter Blanks or Charms
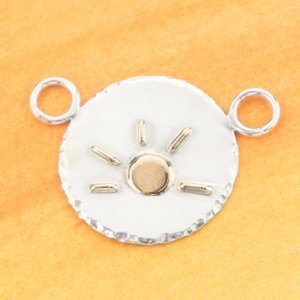
This was a piece I made a while ago. I was soldering our new ornaments at the time and did a practice run to try them out. I soldered the two rings on either side because I didn't want to drill a hole through the blank, which created a simple link out of this piece. Solder additional rings on each side of the piece then attach footage chain (or make a chain out of jump rings!) and add a clasp to create a nice bracelet or necklace out of it. Adding connection points is an easy way to repurpose blanks or charms as links or chandeliers.
5. Fabricated Basket Setting Short-cut
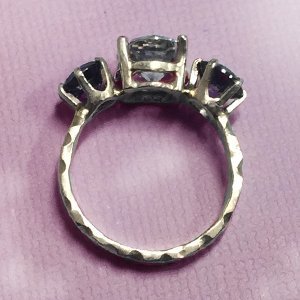
To create this ring, the custom basket setting in the center was made from two 8mm jump rings. After the basket setting was soldered together, one 6-prong setting head was soldered onto either side of it. Lastly, the group of settings was soldered onto a ring band, then the band was textured and completed with a spin in the tumbler before the stones were set. Jump rings are a big time saver when making custom prong settings.
These are just a few random pieces that you can create. Play around, it's always fun to try new things whether they are successful or not.
Learn How to Open and Close Jump Rings
Watch as Hilary Halstead-Scott teaches you how to open and close hard snap jump rings. We love hard snap jump rings because they are made from tempered wire and just snap into place!
Additional Articles:
How to Make Chain Necklaces & Bracelets
Halstead is one of North America's leading distributors of jewelry supplies. Halstead specializes in wholesale findings, chain, and metals for jewelry artists.
Got questions? Email our studio coordinator at [email protected]. We’d love to hear from you. Sorry, studio support is not available by phone. Emails only, please.


